
How to create Single Name on Facebook.
Hello people! Have you ever wanted to keep a single name on facebook? But you were not able to add the name? Actually, Facebook doesn’t let everyone to keep a single name since it goes against their policy. But Facebook also has another policy where people from Indonesia can keep the single name since they do not have a surname. So we can trick Facebook as if we are from Indonesia and keep a single name. Today you’re about to learn how you can make a single name on facebook. So let’s get started.
You can do this from both Android and Computer. But I prefer the PC because it is easier and you won’t need any VPN. I’ve provided all the steps in detail. Make sure to follow it properly. First of all, change your proxy to any Indonesian proxy. To do that follow the given steps.
Step 1: If you’re on a PC, get a fresh Indonesian proxy from here. If you are using android, download a VPN app that has Indonesian Proxy.
(Android users can skip till step 6 if you have added a VPN)
Step 2: Open settings in chrome or firefox and search for “Proxy” in settings search box.


Step 3: Then you can open the “proxy settings” from that page as shown in the above image.
Step 4: After that, you’ll get a new windows “Internet Properties” as shown in the image below

Step 5: Now go to “LAN settings” which looks like this. And Untick Automatically detect settings and tick on “Use a proxy for your LAN”
Add the address and port that you got from Proxynova. Now save the settings and close the settings.

Also read, How Binit bro managed to get the Bounty from Facebook.
Step 6: Now open your Facebook settings
Step 7: Open Language Settings and change your Language in Bahasa Indonesia
Step 8: Open name settings in your Facebook and simply remove your last name/ middle name and just keep the first name.
Step 9: Click on save changes and enter your password.
Now your facebook name is changed to a single name.
Now the final steps to revert back your language and internet settings.

Step 10: Change your language to “English” again from Bahasa Indonesia.
Step 11: Remove the proxy that you added in “LAN settings” and use an automatic proxy.
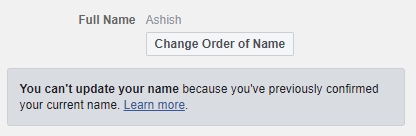
Note: You cannot make a single name if your name limit is reached or you have already verified your name and previously confirmed.
If you have any problem regarding changing your name, feel free to comment here or post in our own Facebook Group “Ask Buddie”
This method is tested and 100% working. But sometimes you might not be able to do it in one go. Try changing your proxy and try to be in good connection network.
So, this is it for today guys. If you found this tutorial helpful, make sure to share with your friends and enjoy your single name on facebook.
Mujhe single name I’d banana hai